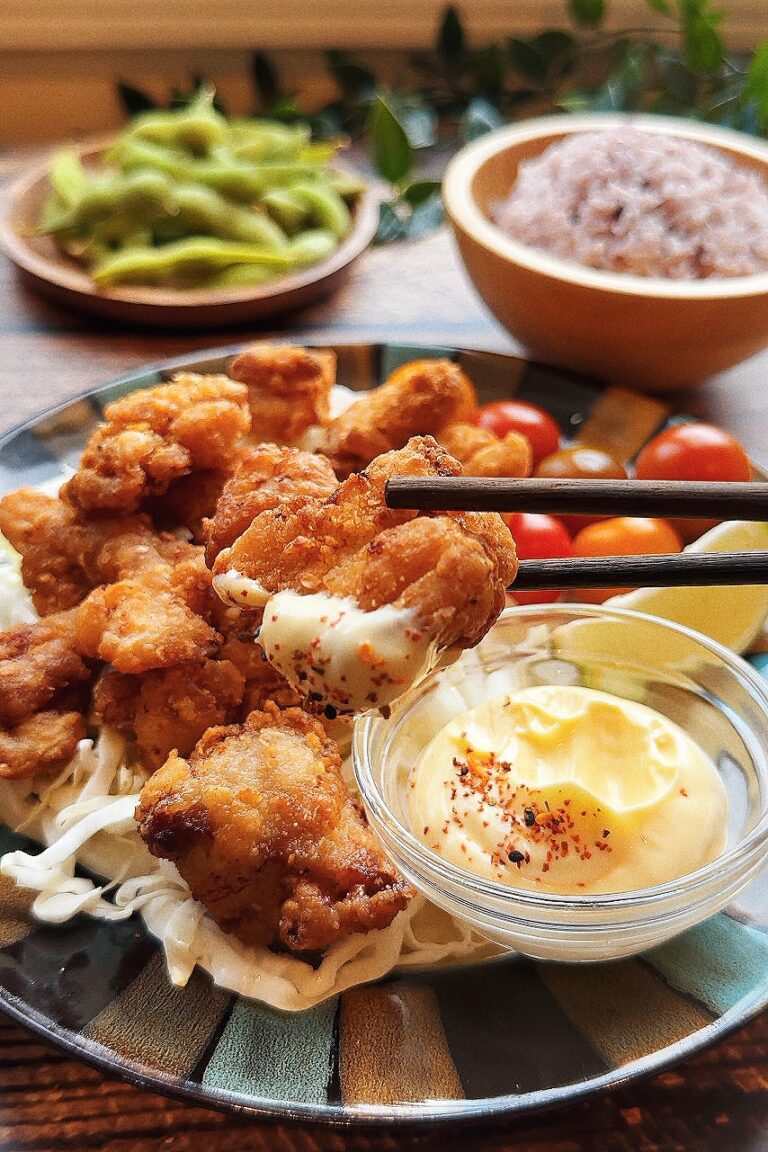
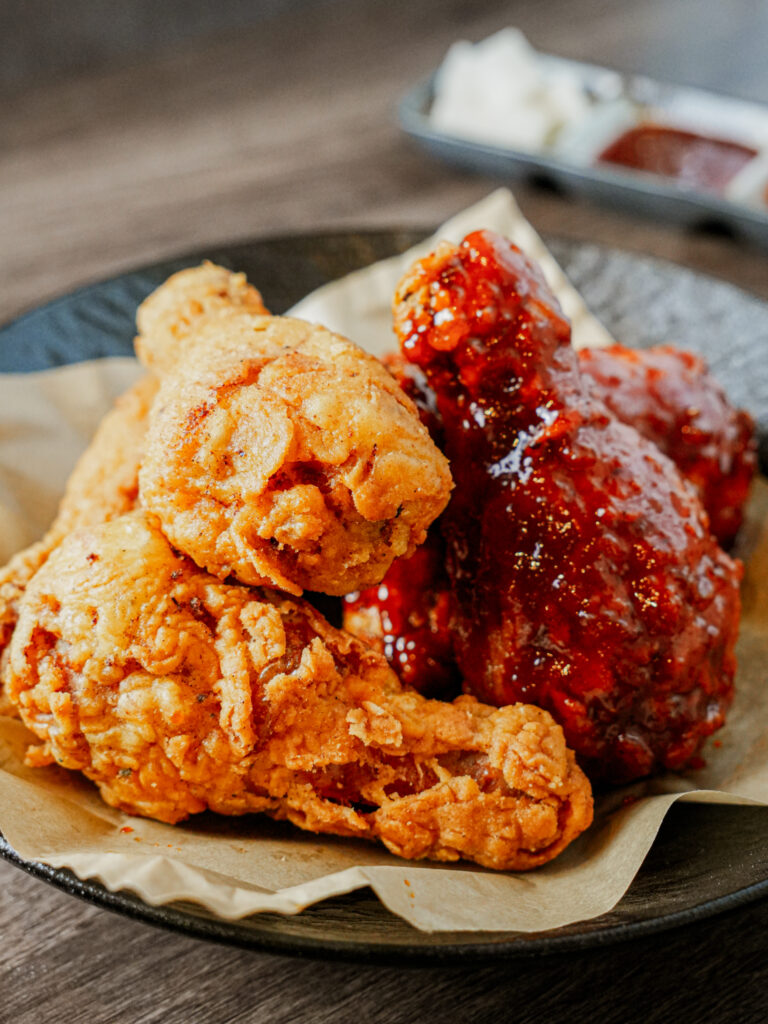
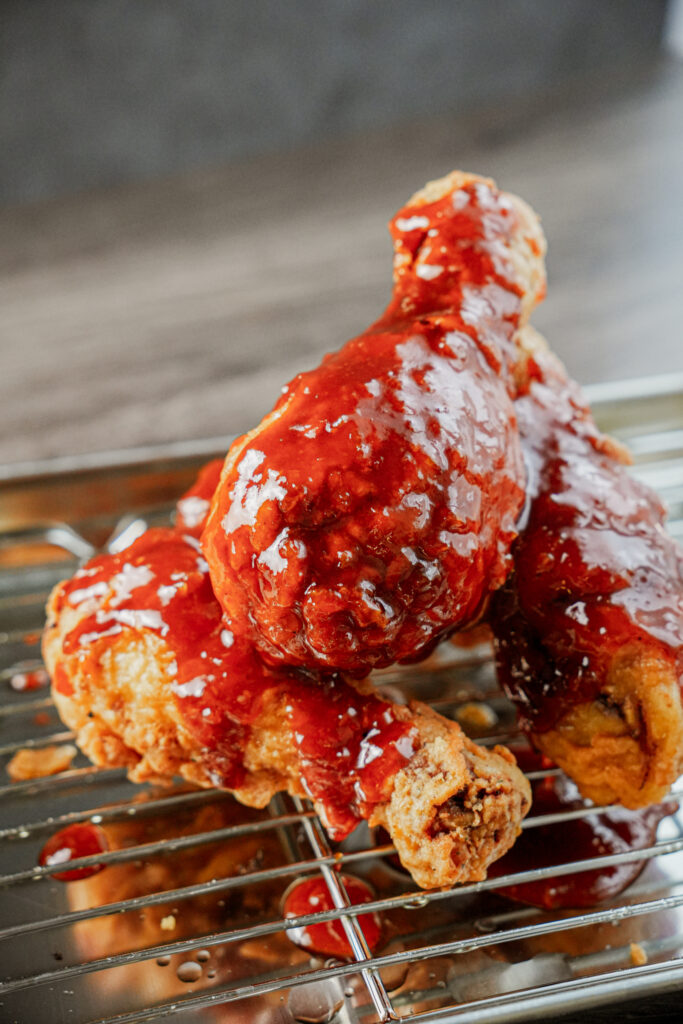
Ultra-Crispy Korean Fried Chicken (with Honey Gochujang Sauce)
Over the years (and many late-night chicken cravings), I’ve made a lot of fried chicken, but this Korean fried chicken is truly something special. Crispy, juicy, addicting enough on its own — and even better when coated in the most irresistible sweet, spicy, garlicky sauce.
This recipe is inspired by tips my Korean chef friend shared with me, and I promise, these little secrets make a big difference. Here’s the breakdown of what I use and why it works:
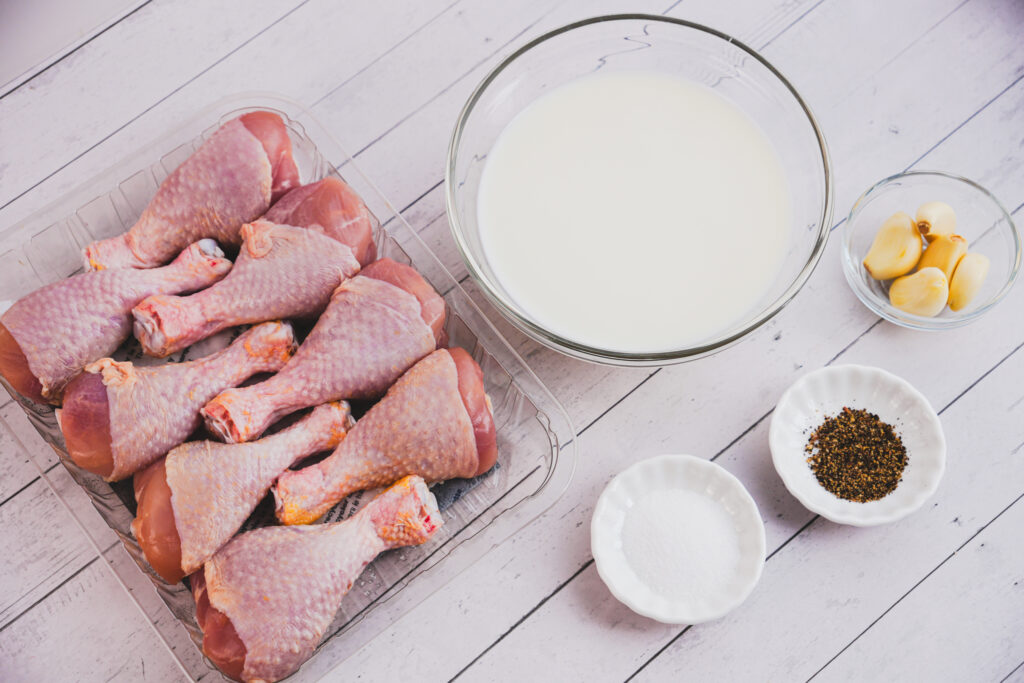
1. Why Brine in Milk?
Milk might sound like an unusual brine, but it’s actually a secret weapon for juicy, flavorful chicken. The lactic acid in milk gently tenderizes the meat without turning it mushy, and it helps draw out any gamey flavors. It is especially helpful if you’re using wings or dark meat.
Plus, milk acts as a mild marinade base that adds subtle richness without overpowering the final flavor. I usually add salt, black pepper, and garlic to boost the flavor. Let the chicken soak for at least 4 hours (overnight is best).
Just make sure to add enough salt. This not only seasons the chicken but also helps it retain moisture and flavor as it fries.
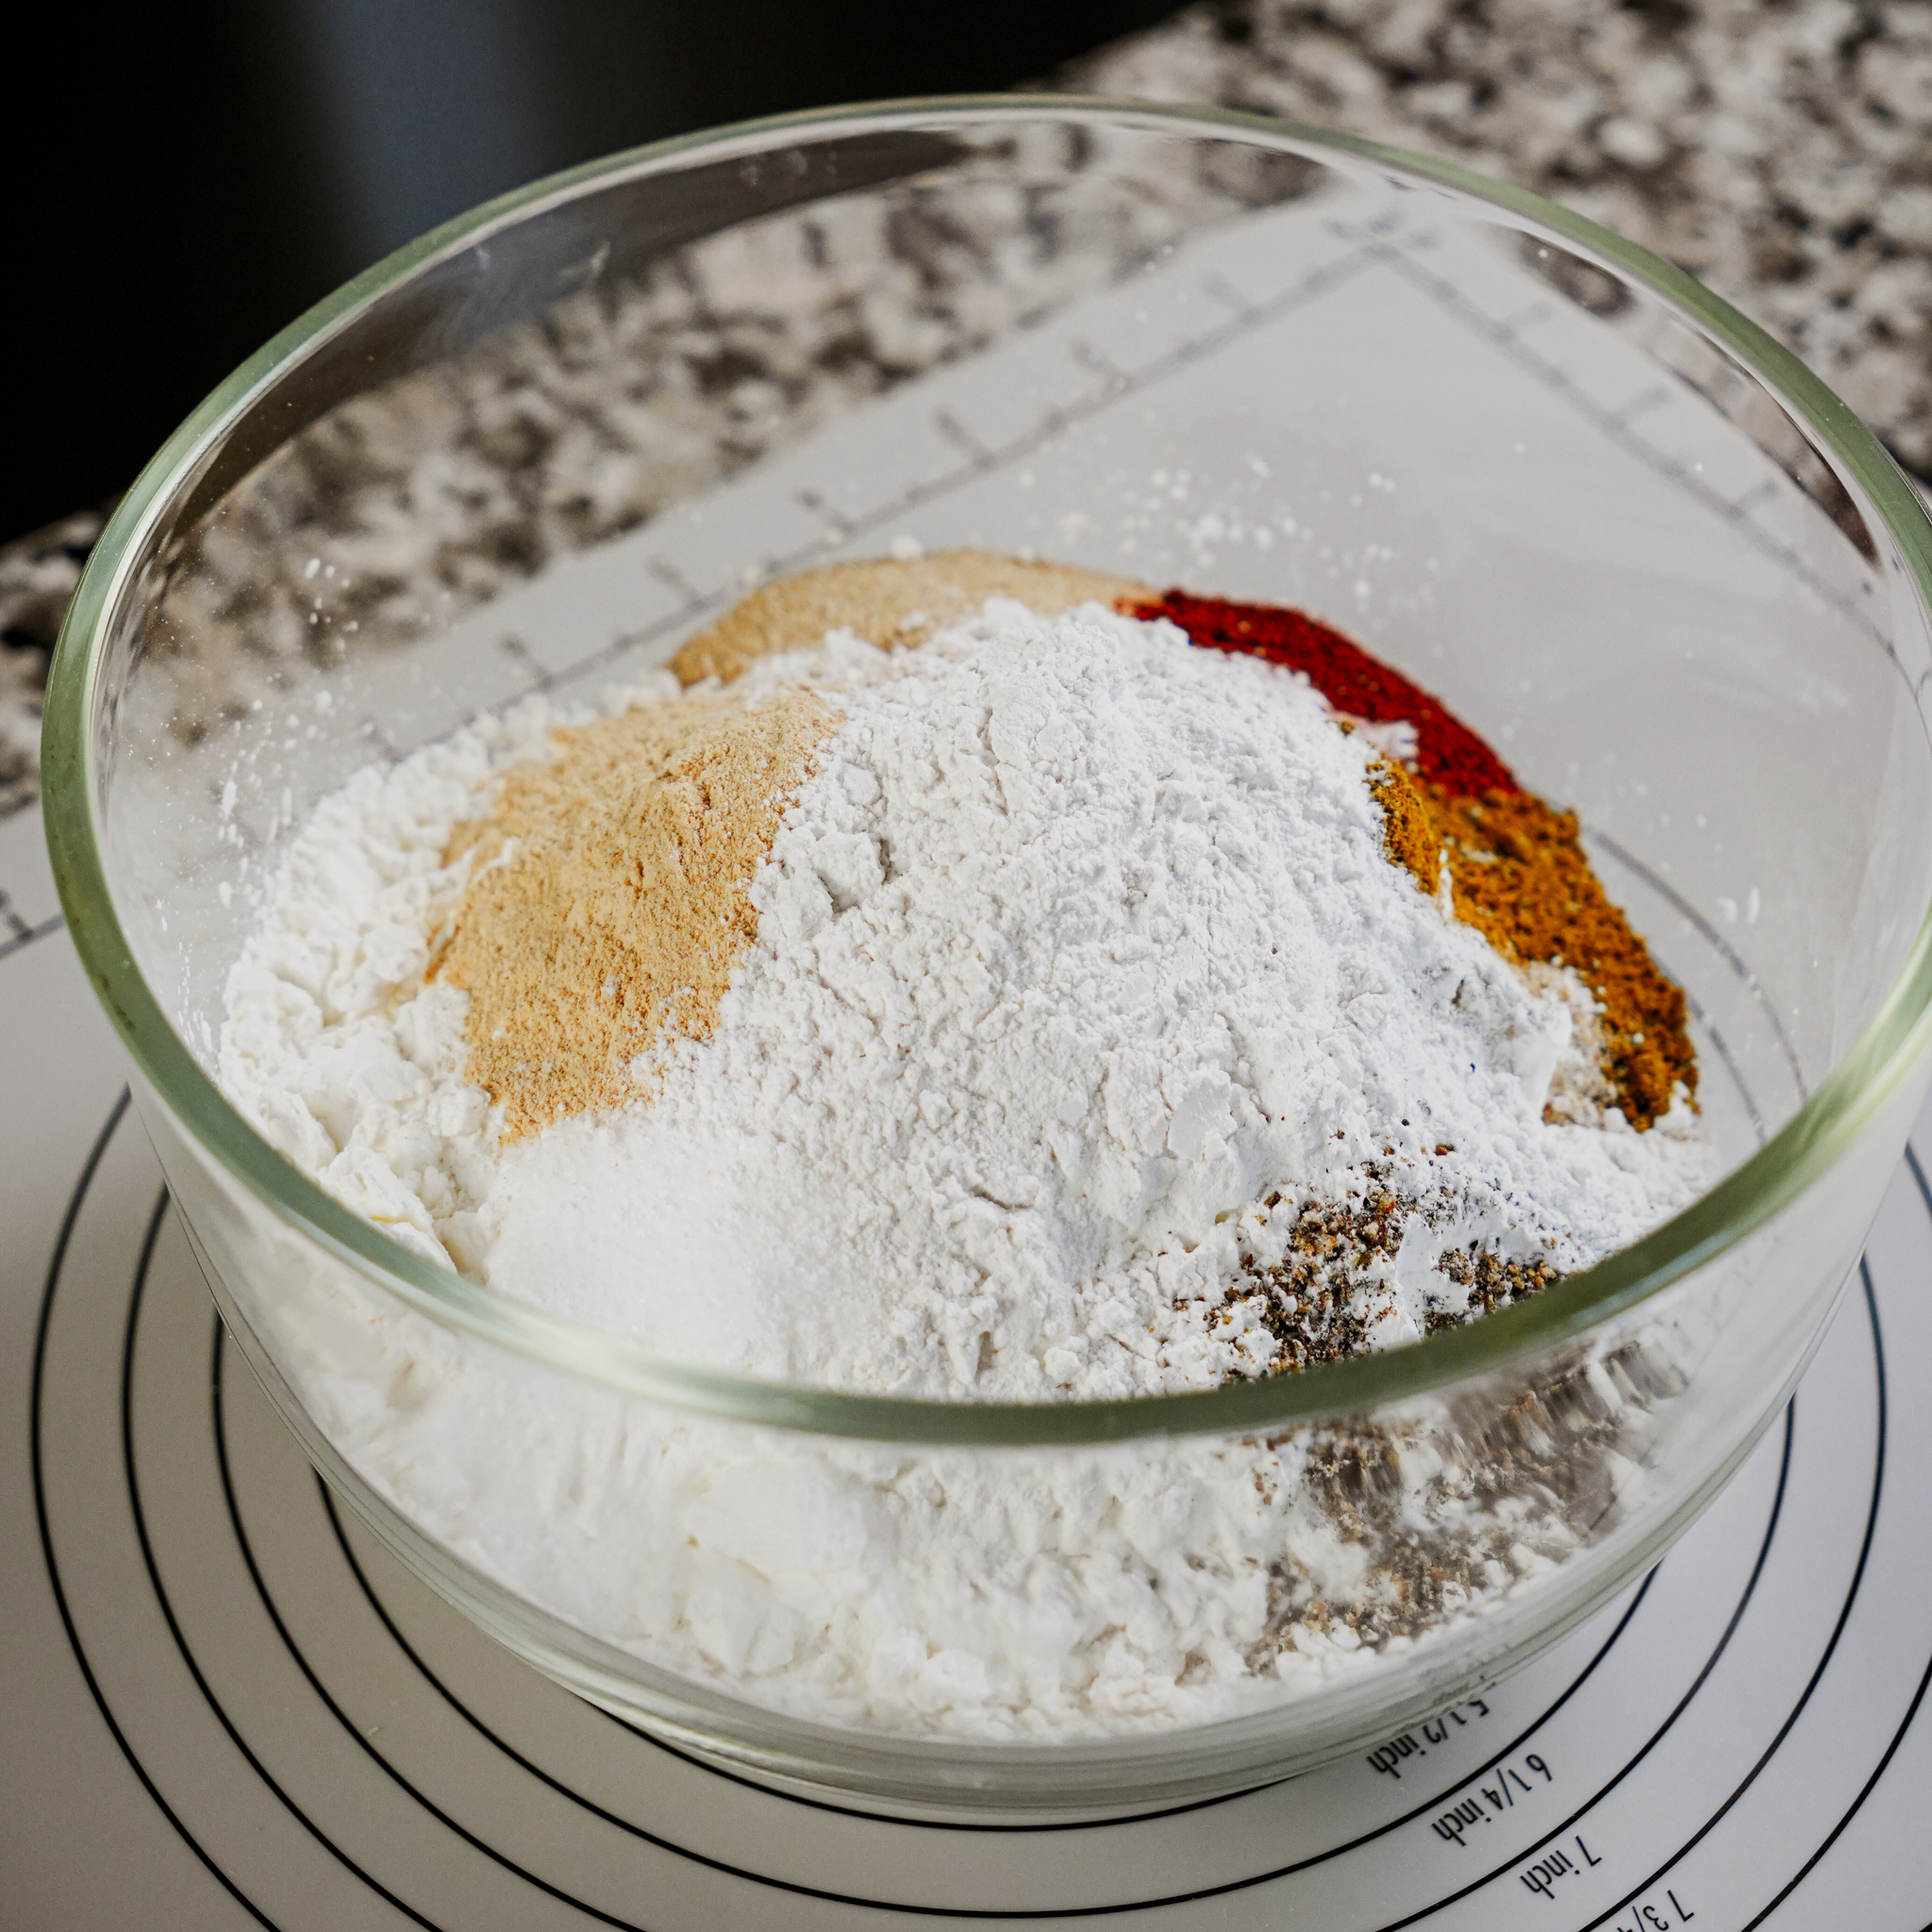
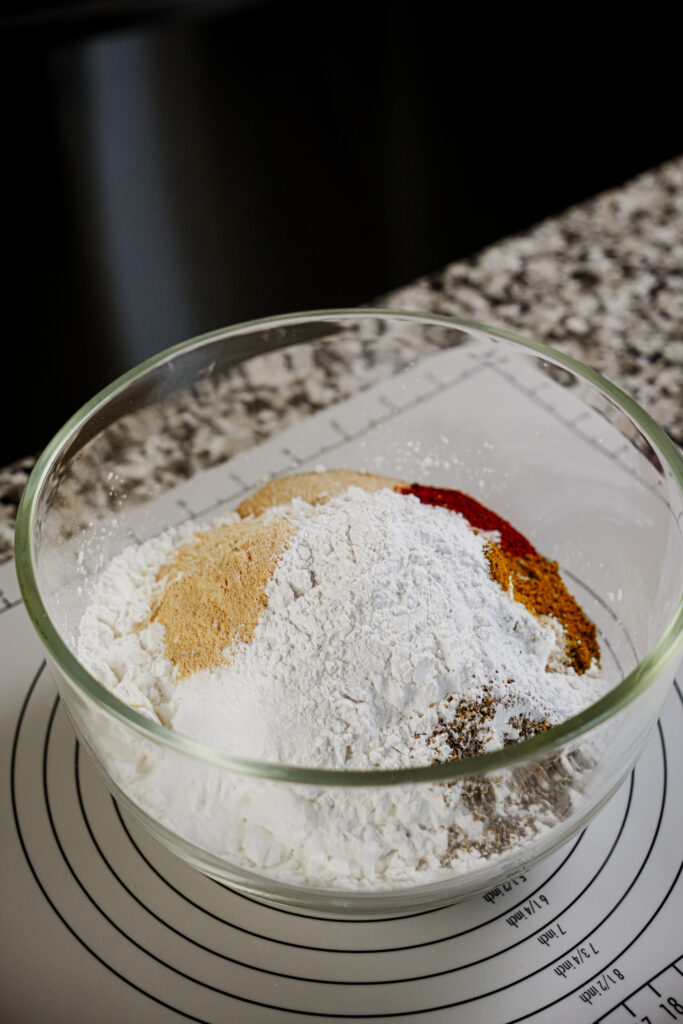
2. Why Use a Mix of Cornstarch and All-Purpose Flour?
The key to that airy, crunchy crust? It’s all in the starch.
- All-purpose flour gives the coating structure and helps it brown beautifully.
- Cornstarch adds lightness and that signature shatteringly crisp texture.
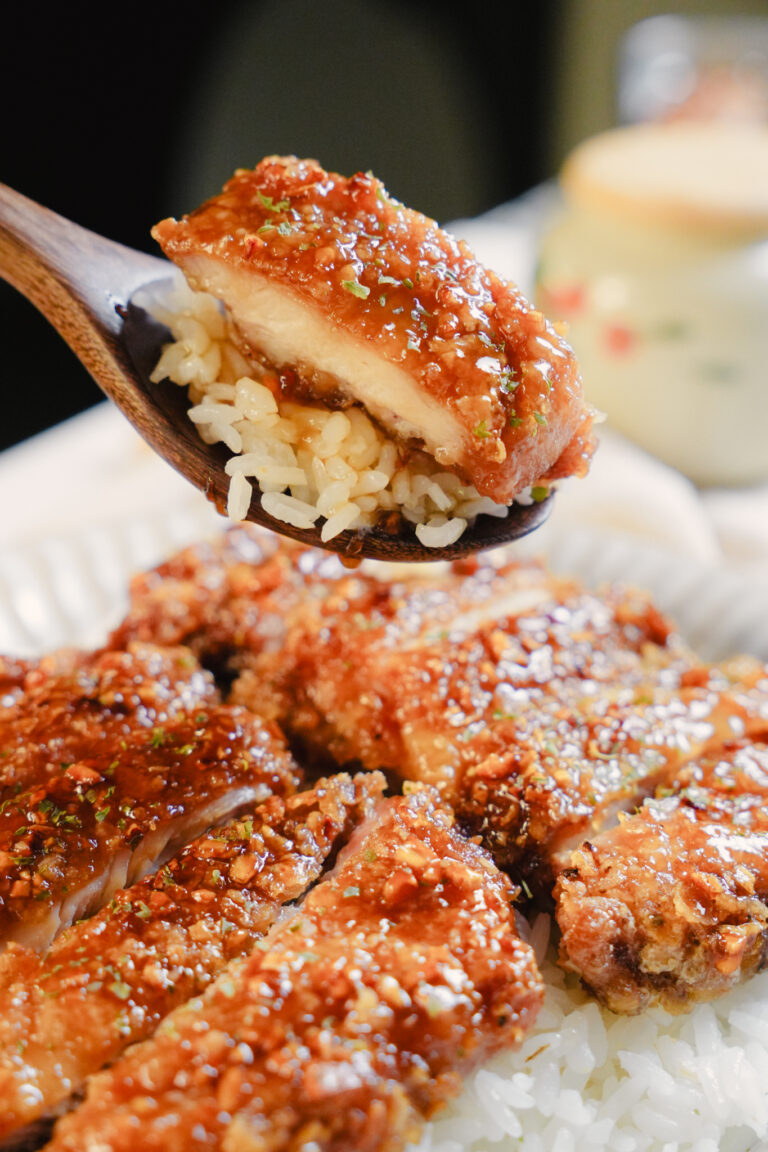
Using both gives you the best of both worlds — a crispy crust that stays crispy even after you toss it in sauce. It’s how you get that signature crackly, craggy Korean-style coating.
A little baking powder in the mix is also essential. It creates tiny air bubbles in the batter, which expand in the hot oil for a lighter, crispier texture.
As for seasoning, that’s totally up to you. Garlic powder, white pepper, paprika—customize it however you like!
3. Can I Just Use Store-Bought Frying Mix for Korean Fried Chicken?
Absolutely! If you’re in a rush, Korean frying mixes from brands like Beksul (백설) or Ottogi work great. They usually include wheat flour, corn starch, baking powder, and seasoning.
But if you want full control over flavor and texture, making your own mix is super easy — and chances are, you already have everything in your pantry.
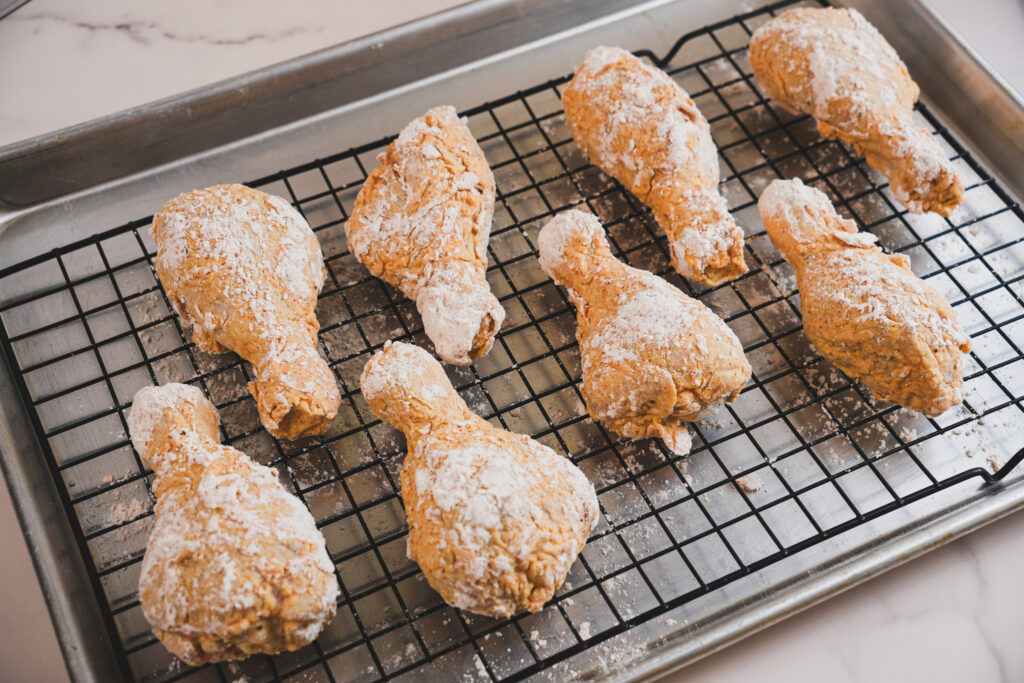
4. Why Use a Wet Batter and Dry Mix?
This two-step coating method is the secret to extra crispy chicken.
First, make a wet batter by mixing some of your dry blend with cold water. The cold temperature helps the batter puff up in hot oil, creating more texture and crunch.
Then, dip the battered chicken back into the dry mix. This creates extra layers and that signature crispy, craggy finish.
Think of it like this: the wet batter is your glue, and the dry mix is your crispy armor.
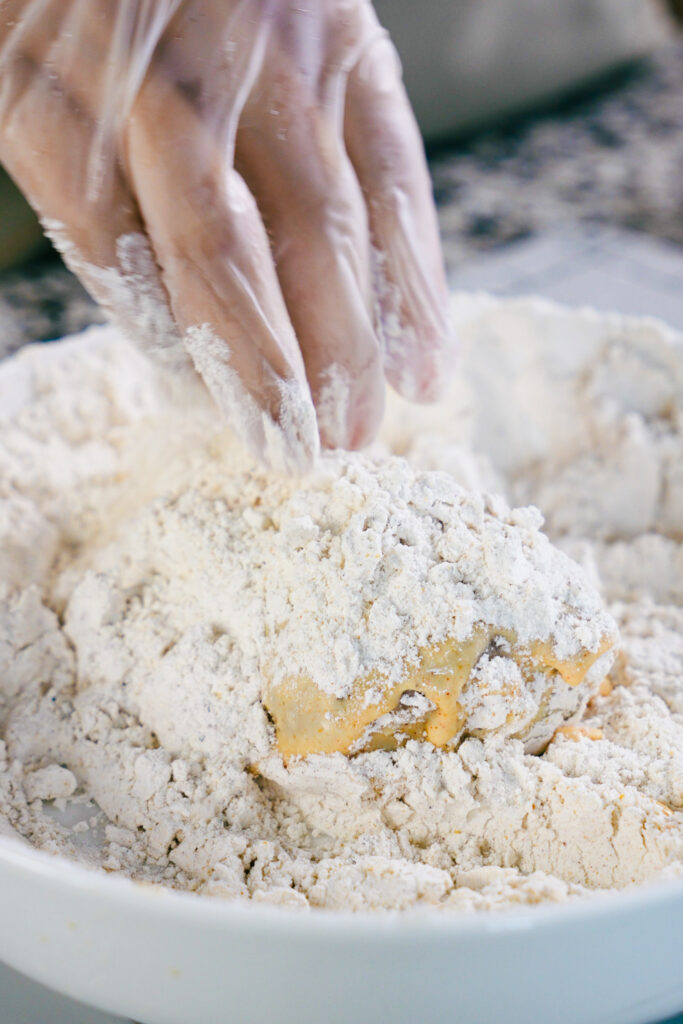
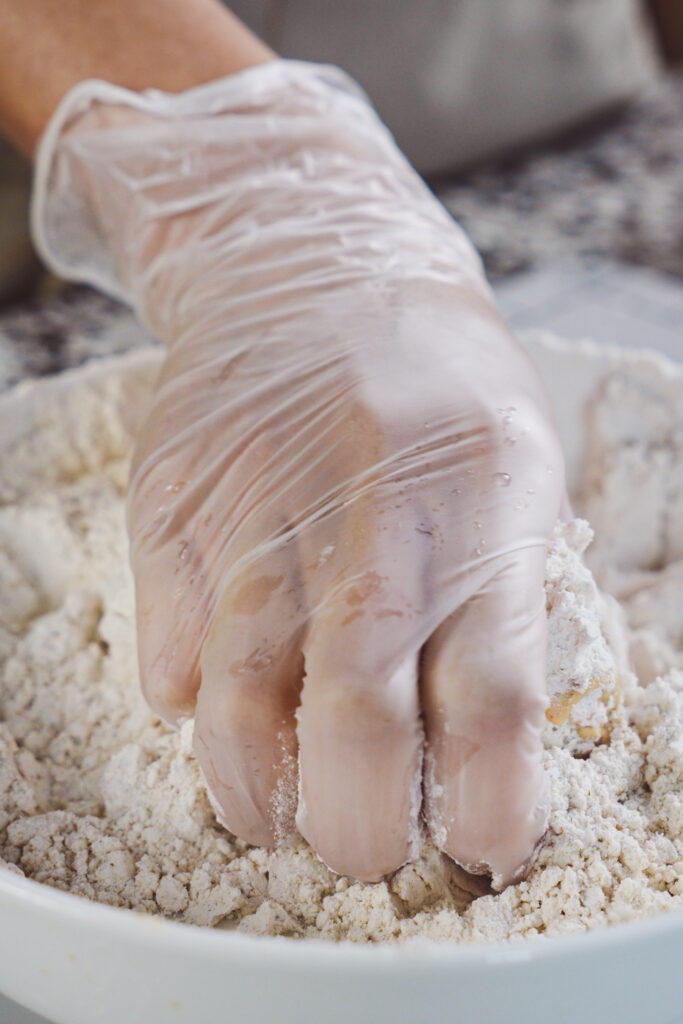
5. Techniques for That Perfect Crispy Coating
Here’s where the real magic happens. After coating the chicken in dry mix:
- Squeeze the chicken and shake the coating.
This step is key to forming uneven ridges and flakes, which fry up into golden, ultra-crispy bits.
So really press the dry mix into the chicken, then give it a gentle shake to let any loose bits fall back. Those little extras will crisp up beautifully when fried.
With these key tips in mind, you’ll be able to master ultra-crispy Korean fried chicken at home. Once you taste that first crunchy, saucy bite, you’ll know it was totally worth it. 😋

How to Make Korean Fried Chicken with Honey Gochujang Sauce
Ingredients
For the Chicken
- 8 drumsticks or ~2 lb wings/thighs
- Neutral oil for frying
Milk Brine
- 1½ cups milk
- 1½ tsp salt
- ½ tsp black pepper (about 1g)
- 5 cloves garlic, grated — or 1½ tbsp garlic powder
Frying Mix
- 1 cup all-purpose flour
- 1 cup cornstarch
- 1 tsp salt
- ½ tsp black pepper
- 2 tsp garlic powder
- 2 tsp onion powder
- 2 tsp paprika
- ½ tsp curry powder
- 1 tbsp baking powder
Spicy Honey Gochujang Sauce
- ½ tbsp sesame oil
- 4 cloves garlic, minced
- 2 tbsp ketchup
- 1½ tbsp gochujang
- 2 tbsp honey
- 1 tbsp sugar
- 1 tbsp soy sauce
- 1 tbsp water
Instructions
1. Brine the Chicken
Wash and pat dry your chicken. In a bowl, mix milk, salt, black pepper, and grated garlic until combined. Add the chicken, cover, and refrigerate for at least 4 hours (ideally overnight) to let it soak in all the flavor and tenderness.
2. Prepare the Frying Mix
In a large bowl, whisk together all the frying mix ingredients. Store any extra in an airtight container so the baking powder stays active (if you’re making a large batch or planning ahead).


3. Make the Wet Batter
When ready to fry, take 1 cup of the dry mix and whisk it with ⅔ cup cold water until it reaches a fast-flowing ribbon consistency — runny but able to cling to the chicken. Add a little water (½ tbsp at a time) if it’s too thick (some flours may absorb more moisture than others).
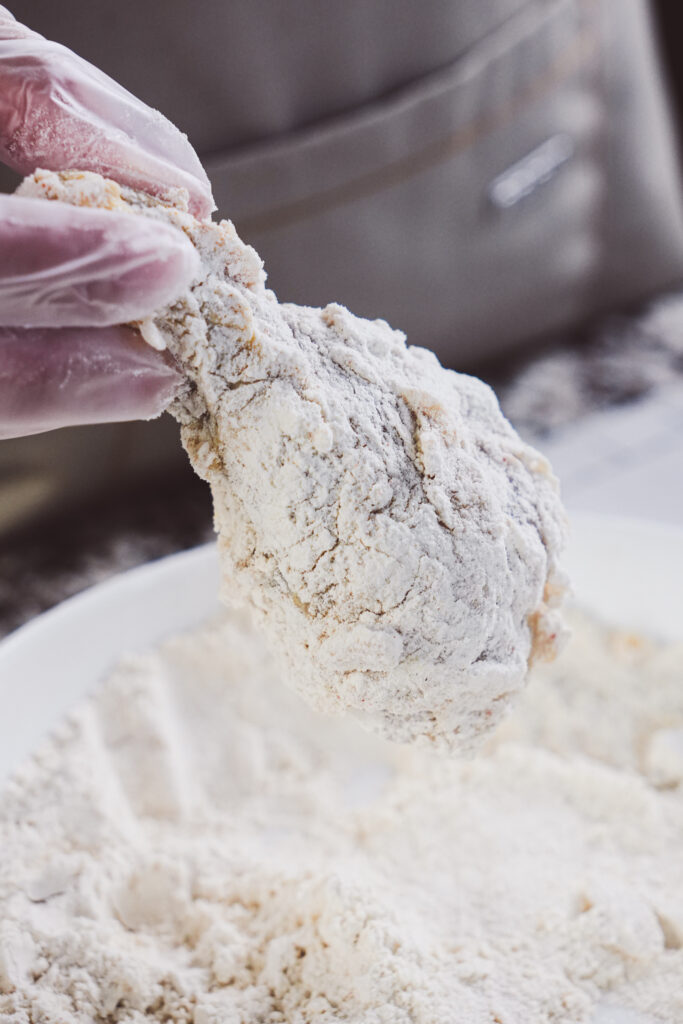
4. Coat the Chicken
Remove the chicken from the brine and let any excess liquid drip off.
Dip each piece into the wet batter, then coat thoroughly in the dry mix.
Use your hands to press the dry mix into the chicken, then gently shake off excess—this creates flaky ridges which fry up into that signature ultra-crunchy coating.
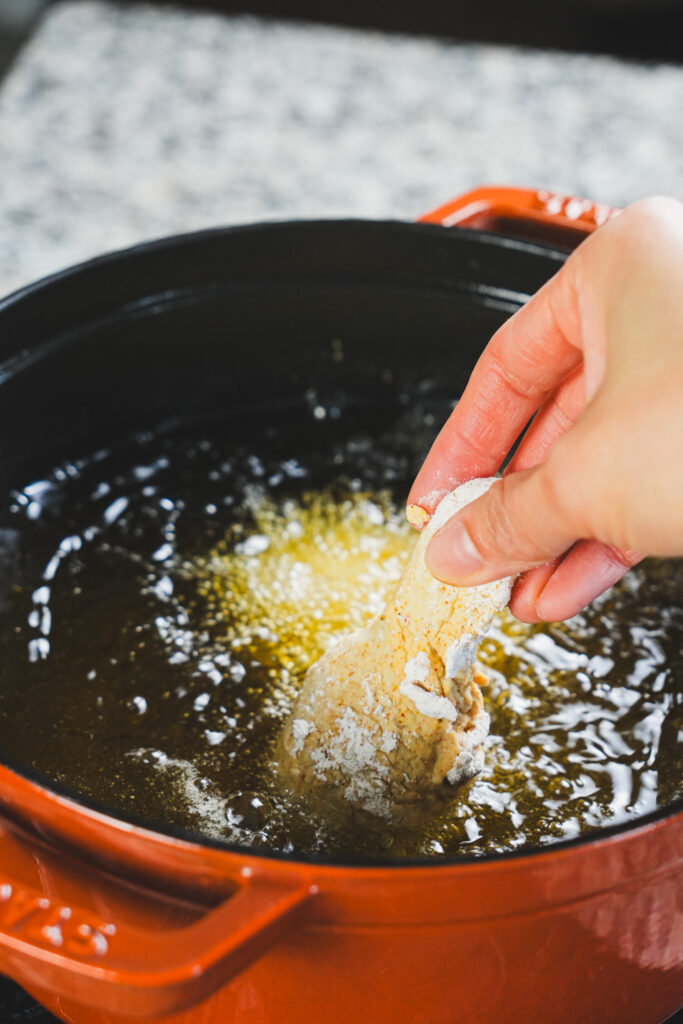
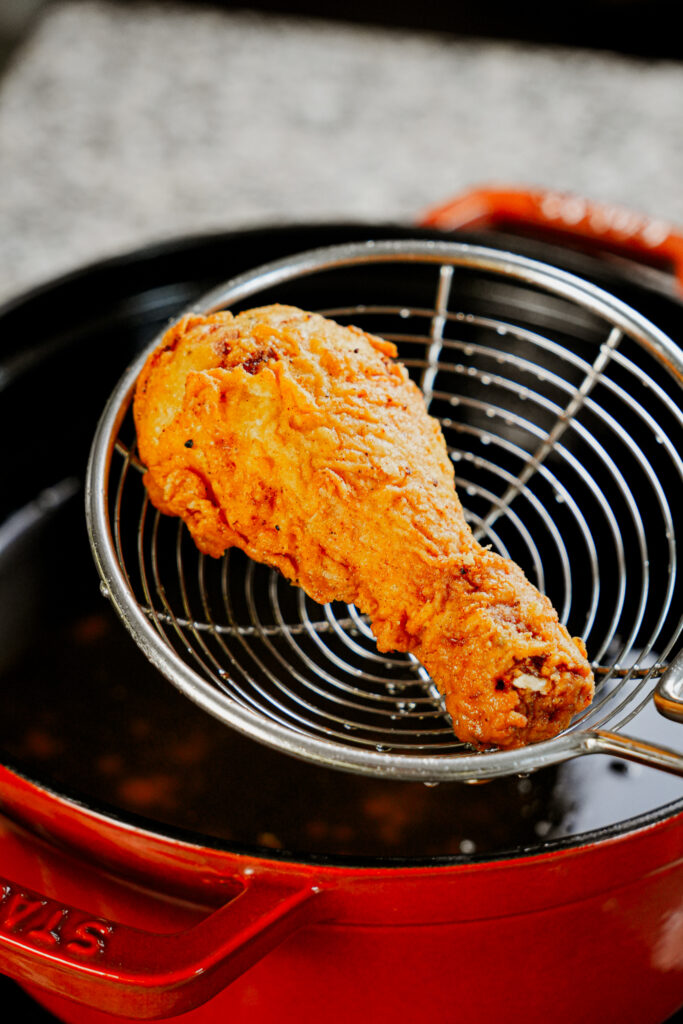
5. Deep Fry
Heat a pot of neutral oil to 325 – 350°F (175°C). Fry the chicken in batches (don’t overcrowd the pot).
For drumsticks, fry for 8–12 minutes, or until golden brown and crispy. Internal temperature should reach 165°F (74°C).
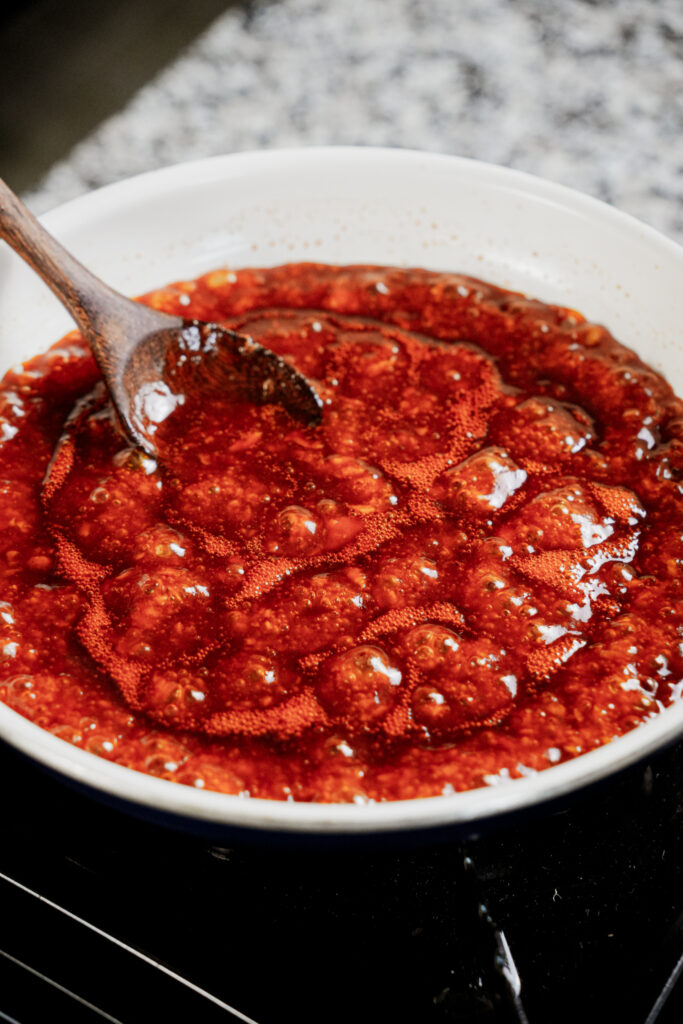
6. Make the Sauce
In a small saucepan, combine all the sauce ingredients. Bring to a simmer over medium heat for about 30 seconds, just until fragrant and slightly thickened.
7. Serve
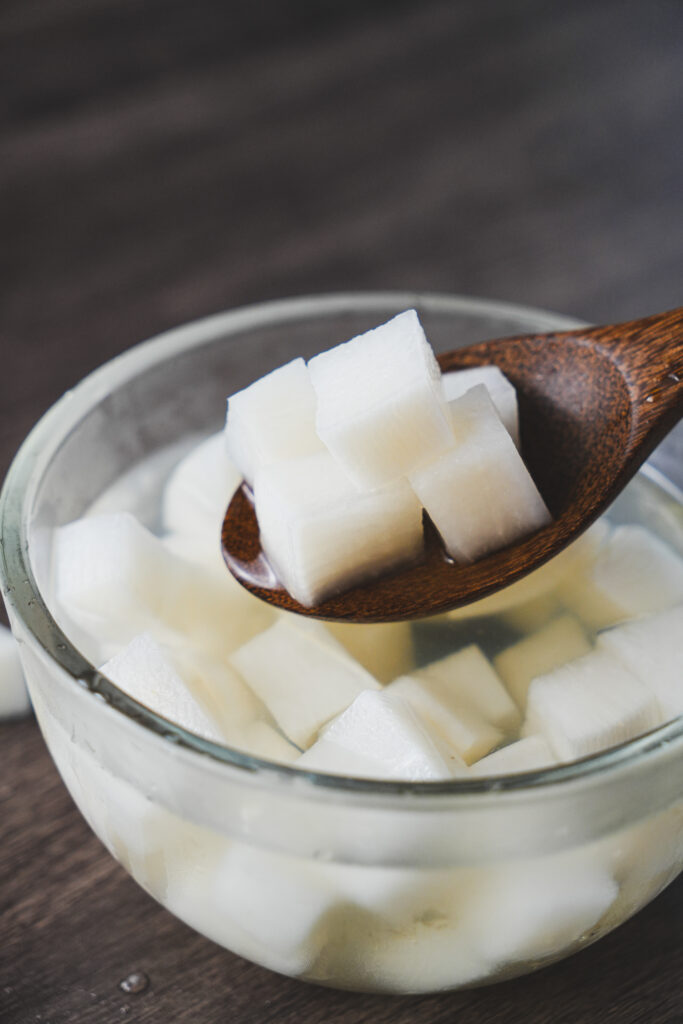
Toss the hot chicken in sauce or serve it as a dipping sauce on the side. Pair with sweet and sour pickled radish for a refreshing bite between the heat and crunch. Serve immediately for maximum crispiness!
How to Store Leftover Frying Oil
Deep-frying uses a lot of oil, but the good news is: you can absolutely reuse it! Here’s how I store leftover frying oil safely and make the most out of it:
- Let the oil cool completely. After frying, turn off the heat and allow the oil to cool to room temperature. Never try to strain hot oil — it’s dangerous and messy.
- Strain out the bits. Use a fine mesh strainer or cheesecloth to filter out any crumbs or fried batter pieces. This helps keep the oil from turning rancid too quickly.
- Use a clean, dry container. I like using a glass jar or a metal oil storage pot with a built-in strainer. Make sure your container has a lid and is completely dry before pouring the oil in. Mixing in water can cause the oil to spoil faster.
- Label it. If you’ve fried something strongly flavored (like fish or spicy food), label the oil so you know what it was used for. It’s best to reuse oil for similar dishes.
- Store in a cool, dark place. Keep the strained oil in your pantry or the fridge to slow down oxidation. In general, you can reuse oil up to 2–3 times, depending on how clean it is and what you cooked with it.

Similar recipes to check out
Looking for more authentic recipes? Be sure to follow me on Pinterest, Instagram, Tiktok and Youtube!

Ultra-Crispy Korean Fried Chicken (with Honey Gochujang Sauce)
Ingredients
For the Chicken
- 8 drumsticks or ~2 lb wings/thighs
- Neutral oil for frying
Milk Brine
- 1½ cups milk
- 1½ tsp salt
- ½ tsp black pepper about 1g
- 5 cloves garlic minced — or 1½ tbsp garlic powder
Frying Mix
- 1 cup all-purpose flour
- 1 cup cornstarch
- 1 tsp salt
- ½ tsp black pepper
- 2 tsp garlic powder
- 2 tsp onion powder
- 2 tsp paprika
- ½ tsp curry powder
- 1 tbsp baking powder
Spicy Honey Gochujang Sauce
- 4 cloves garlic minced
- 2 tbsp ketchup
- 1½ tbsp gochujang
- 2 tbsp honey
- 1 tbsp sugar
- 1 tbsp soy sauce
- 1 tbsp water
- ½ tbsp sesame oil
Instructions
Brine the Chicken
- Wash and pat dry your chicken. In a bowl, mix milk, salt, black pepper, and grated garlic until combined. Add the chicken, cover, and refrigerate for at least 4 hours (ideally overnight) to let it soak in all the flavor and tenderness.
Prepare the Frying Mix
- In a large bowl, whisk together all the frying mix ingredients. Store any extra in an airtight container so the baking powder stays active (if you're making a large batch or planning ahead)
Make the Wet Batter
- When ready to fry, take 1 cup of the dry mix and whisk it with ⅔ cup cold water until it reaches a fast-flowing ribbon consistency — runny but able to cling to the chicken. Add a little water (½ tbsp at a time) if it’s too thick (some flours may absorb more moisture than others).
Coat the Chicken
- Remove the chicken from the brine and let any excess liquid drip off.
- Dip each piece into the wet batter, then coat thoroughly in the dry mix.
- Use your hands to press the dry mix into the chicken, then gently shake off excess — this creates flaky ridges, which fry up into that signature ultra-crunchy coating.
Deep Fry
- Heat a pot of neutral oil to 325°F – 350°F (175°C). Fry the chicken in batches (don’t overcrowd the pot).
- For drumsticks, fry for 8–12 minutes, or until golden brown and crispy. Internal temperature should reach 165°F (74°C).
Make the Sauce
- In a small saucepan, combine all the sauce ingredients. Bring to a simmer over medium heat for about 30 seconds, just until fragrant and slightly thickened.
Serve
- Toss the hot chicken in sauce or serve it as a dipping sauce on the side. Pair with sweet and sour pickled radish for a refreshing bite between the heat and crunch. Serve immediately for maximum crispiness!